Self-Storage Unit Turnover: Efficient Cleaning, Inspection, and Reset Protocols for Facility Managers
Introduction: Why Self-Storage Unit Turnover Matters
In the competitive world of self-storage, maximizing occupancy and maintaining an impeccable reputation hinges on how efficiently and thoroughly you handle unit turnover. Every day a unit sits vacant between tenants is lost revenue, and every missed detail in turnover can lead to dissatisfied customers, negative reviews, or even costly repairs down the line. Yet, the turnover process—cleaning, inspecting, and resetting a unit for the next renter—is often underestimated or handled inconsistently. Facility managers who master this process can dramatically reduce vacancy periods, boost tenant satisfaction, and elevate their facility’s operational standards. This comprehensive guide will walk you through each step of the self-storage unit turnover process, from initial move-out inspection to final reset, with expert protocols, recommended supplies, and actionable checklists to ensure every unit is rental-ready, every time.
Understanding the Unit Turnover Process
What is Unit Turnover?
Unit turnover refers to the series of tasks performed after a tenant vacates a storage unit and before a new renter moves in. This includes clearing out abandoned items, deep cleaning, inspecting for damage or maintenance needs, and resetting the unit to a presentable, secure, and marketable condition.
Why Efficiency and Consistency Matter
Efficient turnover reduces the downtime between tenants, directly impacting your bottom line. Consistent protocols also ensure that every customer receives the same high standard of service, preventing issues like recurring pest problems, unnoticed damages, or cleanliness complaints that can tarnish your facility’s reputation.
Step 1: Move-Out Inspection and Documentation
Scheduling and Preparation
When a tenant notifies you of their intent to vacate, schedule a move-out inspection as soon as possible. Prepare a standardized inspection checklist tailored to your facility’s unique requirements. Equip your staff with a tablet or printed form, camera or smartphone for documentation, gloves, and basic safety gear.
Key Inspection Points
- Unit Contents: Verify that all items have been removed. Photograph the unit for records.
- Locks and Doors: Check for tenant-supplied locks left behind. Test the door for smooth operation and inspect for damage.
- Walls and Floors: Look for stains, holes, or signs of water intrusion.
- Pests or Debris: Note any evidence of rodents, insects, or leftover trash.
- Structural Damage: Document any dents, rust, or broken components.
Abandoned Property Protocol
If belongings are left behind, follow your state’s laws and company policy for handling abandoned property. This typically involves notifying the former tenant, storing items for a set period, and documenting the process. Never dispose of or auction items prematurely, as this can result in legal liability.
Step 2: Clearing and Debris Removal
Essential Supplies
- Heavy-duty trash bags and bins
- Gloves, dust masks, and safety goggles
- Basic hand tools (screwdrivers, pliers, utility knife)
- Industrial broom and dustpan
- Portable vacuum or shop-vac
- Disinfectant spray and wipes
Debris Removal Steps
- Remove all trash, small items, and any packaging materials.
- Check corners, shelves, and behind doors for overlooked debris.
- Dispose of hazardous materials according to local regulations.
- Sort recyclables and e-waste as appropriate.
Step 3: Deep Cleaning for Move-In Quality
Cleaning Checklist
- Sweep and vacuum all floors to remove dust, dirt, and cobwebs.
- Wipe down walls, doors, and handles with disinfectant.
- Spot-clean stains on concrete or painted surfaces using approved cleaners.
- Inspect ceilings for cobwebs, dust, or signs of leaks; clean as needed.
- Clean door tracks and lubricate moving parts with silicone spray if necessary.
- Deodorize using odor-neutralizing sprays, not just masking fragrances.
Special Considerations
- Climate-Controlled Units: Ensure vents and air returns are dust-free and unobstructed.
- Outdoor Units: Remove leaves, mud, or insect nests from around the entrance.
- Specialty Units: For vehicle or wine storage, follow industry-specific cleaning protocols.
Step 4: Detailed Maintenance Inspection
Structural and Functional Checks
- Door Operation: Test for smooth rolling and secure closure. Adjust or repair as needed.
- Locks and Latches: Confirm functionality and replace damaged hardware.
- Lighting: For units with lighting, verify bulbs and fixtures are operational.
- Seals and Weatherstripping: Inspect for cracks, gaps, or deterioration that could allow water or pests inside.
- Walls and Ceilings: Look for leaks, mold, or structural damage. Schedule repairs immediately if found.
- Floor Condition: Check for cracks, chips, or unevenness that could present a hazard.
Document and Schedule Repairs
Use your facility’s maintenance management system (or a simple spreadsheet) to log any issues and track repair completion. Prioritize repairs that impact security, safety, or weatherproofing.
Step 5: Pest Prevention and Odor Control
Integrated Pest Management
- Inspect for droppings, nests, or insect activity in corners and along baseboards.
- Seal small gaps or cracks with caulk or foam to prevent entry.
- Apply pest deterrents or traps as needed, noting any activity for future monitoring.
Odor Elimination
- Use ozone machines or commercial odor neutralizers for persistent smells.
- Ensure units are well-ventilated post-cleaning to allow fresh air circulation.
- Never use strong fragrances that could trigger allergies or mask underlying issues.
Step 6: Final Reset and Presentation
Reset Checklist
- Install a new or facility-approved lock (if included in rent).
- Place updated unit number signage if needed.
- Stage the unit with a doorstop or open-door policy for tours if vacant units are shown to prospects.
- Photograph the unit for marketing or rental documentation.
- Log unit readiness in your management software.
Marketing-Ready Presentation
A clean, well-lit, and odor-free unit is your best marketing tool. Ensure each rental-ready unit is visually inspected before listing. Use fresh, high-quality photographs in your marketing materials and website to set accurate expectations for prospects.
Streamlining Turnover with Technology
Digital Checklists and Mobile Apps
Equip your staff with digital checklists accessible via smartphones or tablets. This ensures no step is missed, allows for photo documentation, and can integrate directly with your facility management system for seamless communication and accountability.
Automated Scheduling
Utilize property management software to automatically trigger turnover tasks when a move-out is processed. Assign responsibilities and set deadlines to keep the process on track, even during peak turnover periods.
Staff Training and Standardization
Onboarding Protocols
Develop a structured training module for new team members focused on turnover protocols. Include hands-on demonstrations, written SOPs, and periodic refreshers to maintain standards across all shifts and locations.
Quality Control
Implement regular audits and spot checks to ensure turnover procedures are followed precisely. Provide feedback and recognize staff for consistently high-quality turnovers to reinforce best practices.
Turnover Timelines: Setting Performance Benchmarks
Average Turnover Times
- Standard Unit: 30–60 minutes per unit, including inspection, cleaning, and reset.
- Large or Specialty Unit: 60–120 minutes, depending on prior use and repair needs.
Reducing Downtime
- Schedule inspections and cleaning within 24 hours of move-out.
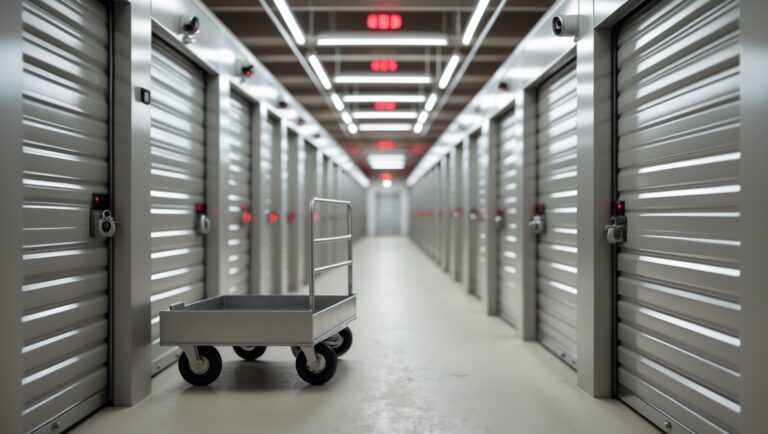
- Pre-stock carts with all necessary supplies for quick mobilization.
- Maintain a rolling log of upcoming move-outs to anticipate staffing needs.
Common Turnover Pitfalls and How to Avoid Them
- Missed Minor Damages: Conduct double-checks for less obvious issues such as small leaks or hairline cracks.
- Ineffective Odor Removal: Always investigate and address the source, not just the symptom.
- Inconsistent Documentation: Use photo logs and centralized software to track every turnover.
- Delayed Repairs: Schedule maintenance promptly and maintain a list of preferred vendors for urgent fixes.
- Overlooking Pest Evidence: Train staff to recognize subtle signs and act quickly to prevent infestations.
Customizing Protocols for Facility Size and Type
Small Facilities
With fewer units, facility managers can personally oversee turnovers and maintain a hands-on approach. Standardized checklists and flexible scheduling ensure quick, thorough resets.
Large or Multi-Site Operations
Larger operations benefit from delegating specific turnover roles—inspection, cleaning, maintenance—to specialized staff. Use centralized management systems for oversight and to maintain consistency across all sites.
Conclusion: The Impact of Proactive Turnover Management
Efficient and thorough unit turnover is more than a back-end task: it’s a cornerstone of operational excellence and customer satisfaction in the self-storage industry. By standardizing cleaning, inspection, and reset protocols, facility managers can dramatically reduce vacancy times, prevent recurring maintenance headaches, and deliver a consistently high-quality product to every renter. Proactive turnover management also safeguards your reputation, ensures compliance with legal and safety standards, and, ultimately, strengthens your facility’s bottom line.
Investing in staff training, leveraging technology, and refining your turnover checklists are all steps that pay dividends in occupancy rates and customer loyalty. Remember, every detail—from eliminating lingering odors to promptly addressing minor damages—contributes to a renter’s first impression and their likelihood of recommending your facility. By treating each unit turnover as an opportunity to showcase your commitment to quality, you not only retain happy tenants but also attract new ones in a competitive marketplace. Make turnover excellence a core part of your operating philosophy, and watch your facility thrive.