How to Conduct a Storage Facility Roof Inspection: Preventing Leaks and Costly Repairs
Introduction: Why Roof Inspections Matter for Storage Facilities
Storage facility owners and managers know that every square foot under their roof is critical. Yet, one of the most commonly overlooked components of any storage operation is the condition of the roof overhead. Leaks, ponding water, degraded seals, and unnoticed punctures can transform secure storage into a nightmare of damaged goods, lost revenue, and expensive repairs. Even a small leak in a storage facility roof can lead to ruined customer property, mold outbreaks, and insurance claims that damage your reputation and bottom line.
Regular, thorough roof inspections are not just a best practice—they are a necessity for proactive property management. Early detection of vulnerabilities can help you avoid emergency repairs, minimize downtime, and extend the useful life of your most valuable asset: your building. This guide walks you step-by-step through the process of conducting a complete storage facility roof inspection, explains what to look for, how to document issues, and how to prioritize repairs before minor issues become costly disasters.
Understanding the Roof Types Found in Storage Facilities
Before beginning an inspection, it’s essential to know what type of roof you have. Most storage facilities use one of the following:
- Metal Roofs: Durable, common in self-storage, but vulnerable to seam leaks and corrosion.
- Built-Up Roofing (BUR): Layers of tar, gravel, and felt; good for flat roofs but can suffer from blistering and membrane splits.
- Single-Ply Membranes (TPO, EPDM, PVC): Popular for flat or low-slope roofs; vulnerable to punctures and seam failures.
- Asphalt Shingles: Less common, mostly on office areas or older facilities.
Each type has unique vulnerabilities. Knowing your roof material is crucial for focusing your inspection on known problem areas.
Before You Inspect: Safety and Preparation
Personal Safety Precautions
- Never inspect alone; always have a spotter or coworker present.
- Wear non-slip shoes or boots.
- Use fall protection for steep or high roofs (harnesses, guardrails).
- Do not inspect in heavy rain, high winds, or icy conditions.
Inspection Tools Checklist
- Inspection checklist (printed or digital)
- Camera or smartphone for photos
- Flashlight for attic or interior checks
- Binoculars (for hard-to-reach areas)
- Moisture meter (for detecting leaks beneath the surface)
- Measuring tape
- Chalk or marker for noting problem areas
- Notepad or inspection app for documentation
Timing and Frequency
- Inspect at least twice per year: once in spring (after winter weather), once in fall (before winter storms).
- After major storms or hail events, inspect immediately.
- Follow up promptly on any reported leaks or stains from tenants or staff.
Step-by-Step Storage Facility Roof Inspection
1. Inspect the Roof Perimeter
Start at the roof’s edge. The perimeter is prone to leaks where flashing meets walls, gutters, or parapets.
- Check flashing for rust, cracks, loose fasteners, or separation from the wall.
- Look for debris buildup in gutters and downspouts. Clogged gutters can cause water to pool and back up under the roofing material.
- Inspect the condition of coping stones, caps, or edge metal for gaps or worn sealant.
2. Survey the Roof Surface
Walk the roof systematically from one end to the other.
- Metal Roofs: Look for corrosion, loose or missing fasteners, popped seams, and punctures. Pay close attention to screw heads and washers—missing gaskets or exposed fasteners are major leak points.
- Single-Ply Membranes: Check for punctures, wrinkles, bubbles, or areas where the membrane is pulling away from the substrate.
- Built-Up Roofs: Identify blisters (raised areas), bare spots where gravel is missing, and cracks in the surface.
- All Types: Note any standing water (ponding) that remains more than 48 hours after rain. This indicates drainage issues or low spots.
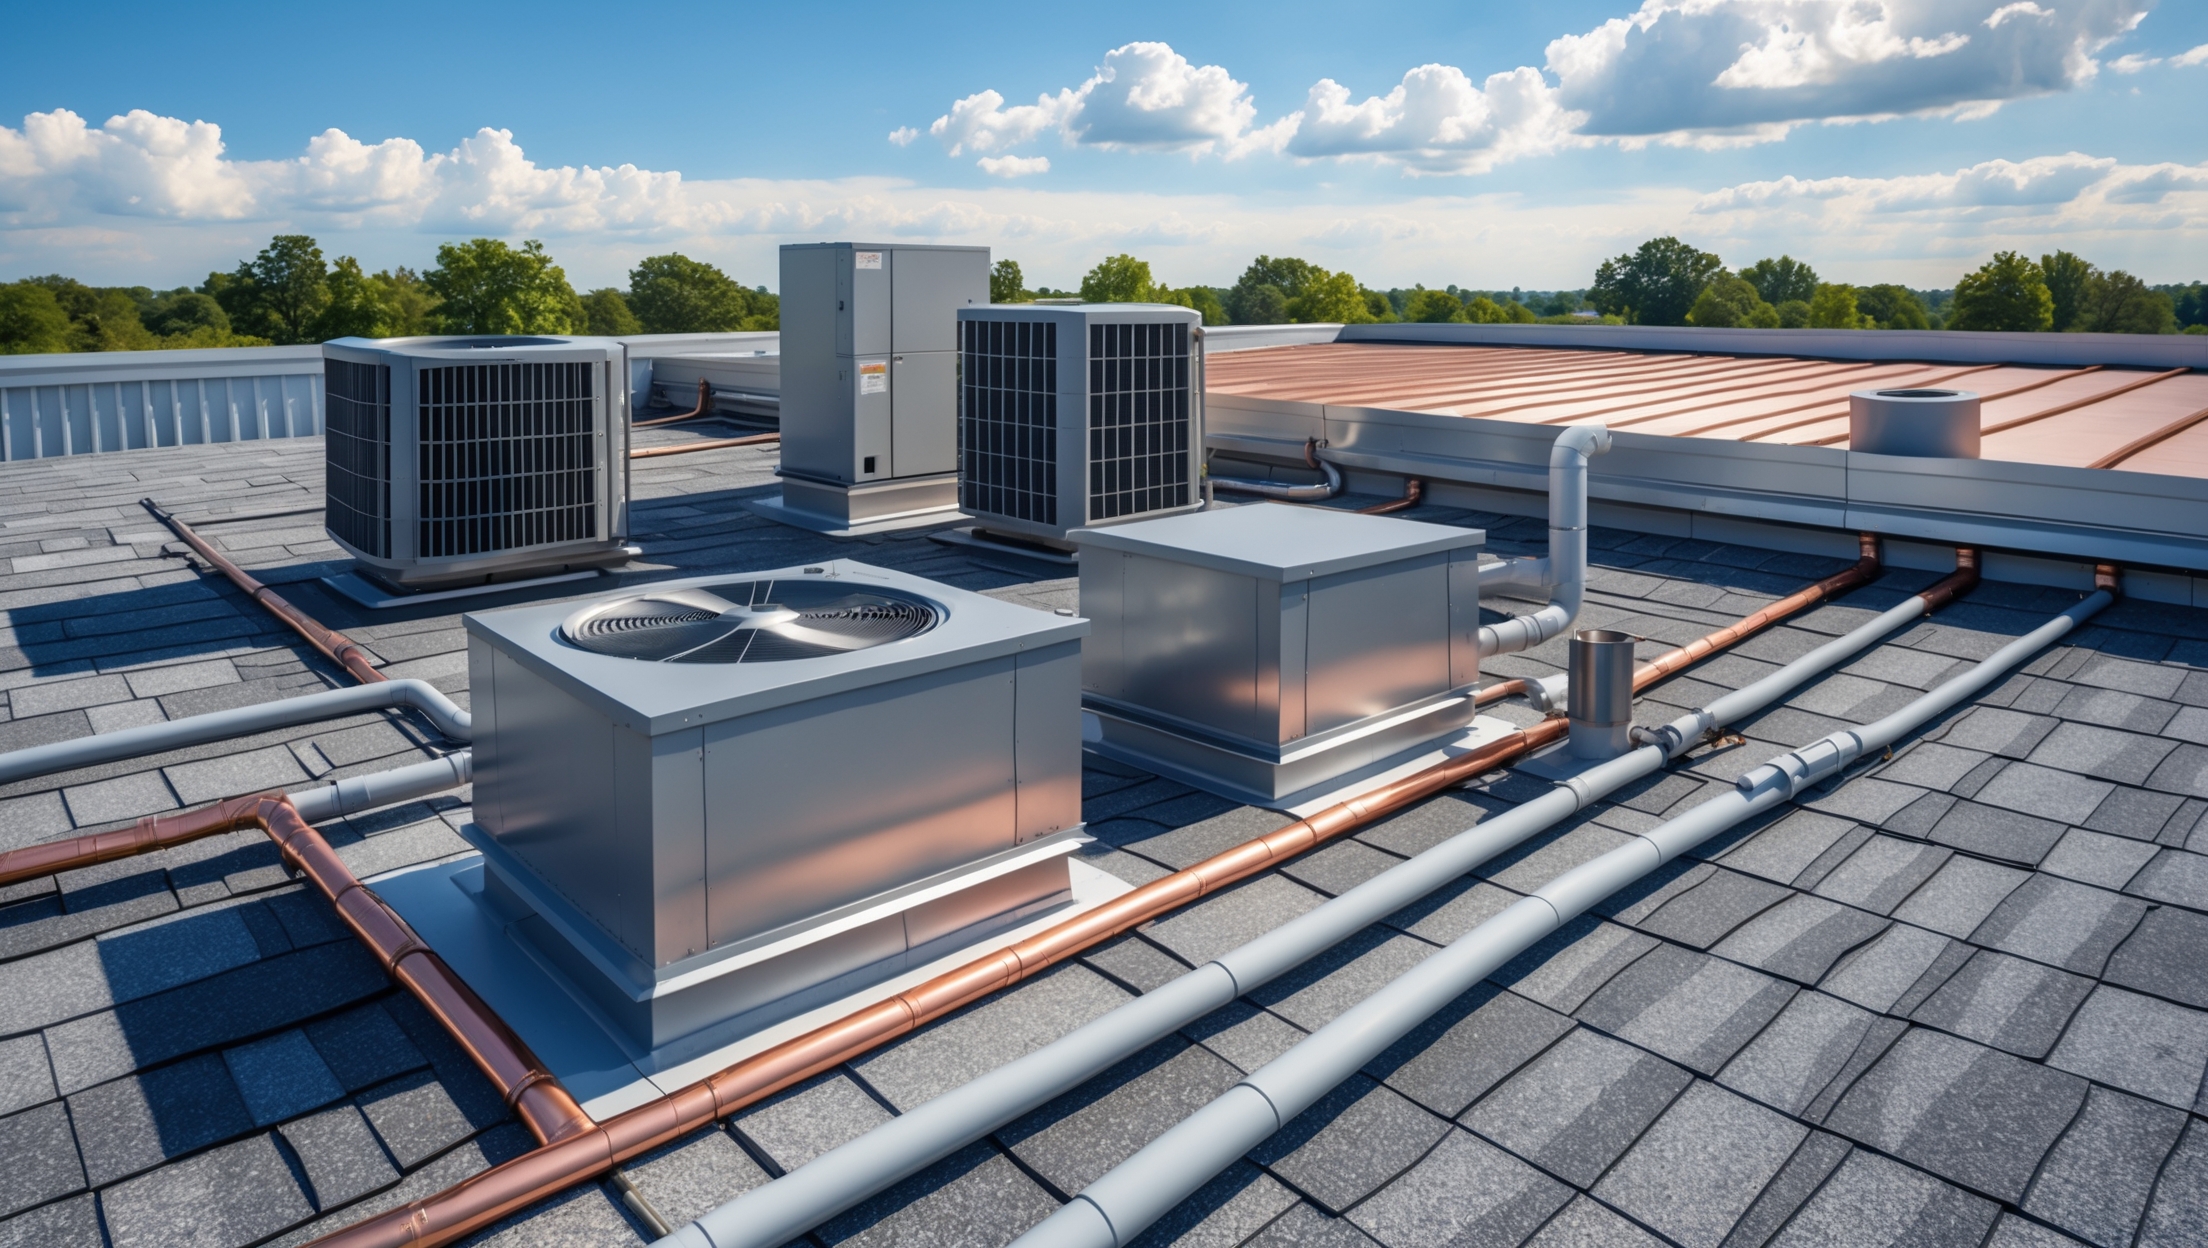
3. Inspect Penetrations and Rooftop Equipment
Any holes in the roof—vents, HVAC units, skylights, antennas—are potential leak sources.
- Examine seals and flashing around penetrations for cracks, gaps, or degraded caulk.
- Check that all boots and gaskets are flexible and intact.
- Ensure rooftop equipment is properly mounted and its supports are not damaging the membrane.
- Look under units for signs of rust, water trails, or algae growth.
4. Evaluate Seams and Joints
Seams are where water most often finds its way in.
- For metal roofs, inspect standing seams and overlap joints for separation and failed sealant.
- For membranes, check heat-welded or glued seams for peeling, splits, or fishmouths (openings at the seam edge).
- Examine expansion joints for integrity and flexibility.
5. Assess Drainage Systems
Proper drainage is vital to preventing water accumulation and leaks.
- Clear debris from drains, scuppers, and gutters.
- Inspect for sagging gutters, disconnected downspouts, or standing water at drain inlets.
- Test roof drains by pouring water to confirm flow, if needed.
6. Check Interior Ceilings and Attics
Sometimes the first sign of a roof problem is inside the building.
- Inspect interior ceilings directly under the roof for water stains, bubbling paint, or mold patches.
- In attic spaces, look for wet insulation, rusted nails, or daylight shining through the roof deck.
- Use a moisture meter to detect hidden leaks around suspect areas.
Common Trouble Spots in Storage Facility Roofs
- Flashing and Roof-Wall Intersections: Prone to separation and water entry.
- Seams and Fasteners: Especially on older metal panels or where foot traffic is common.
- Drainage Areas: Water backup can cause leaks even in undamaged roofs.
- Rooftop Equipment: Improper installation or deteriorated seals around HVAC units, vents, and pipes.
- Low Spots: May not leak immediately but can accelerate membrane degradation.
Documenting and Prioritizing Roof Issues
How to Record Findings
- Take clear, close-up photos of every issue. Include a wide shot for context.
- Mark problem locations on a roof plan or map for easy reference.
- Note the severity: minor (monitor), moderate (schedule repair), severe (urgent action).
- Log weather conditions and date of inspection.
Sample Inspection Log Entry
“Location: Southeast corner near HVAC unit. Issue: Membrane seam lifting, approx. 12 inches. Photo attached. Severity: Moderate. Recommend repair within 30 days.”
What To Do When You Find a Problem
Immediate Action Steps
- For active leaks, place temporary waterproof coverings (roofing cement, tarp) until repairs can be made.
- Block off access to affected storage units if customer property is at risk.
- Notify affected tenants and document communications.
- Contact a qualified commercial roofing contractor for professional assessment and repairs.
When to Call a Professional
- Large or complex leaks, especially those involving structural damage.
- Major seam separations, widespread corrosion, or failed drainage systems.
- When warranty repairs are required (always check your roof warranty first).
Preventive Maintenance: Extending Your Roof’s Life
Simple Steps to Prevent Leaks
- Keep all roof surfaces clear of debris, leaves, and standing water.
- Trim overhanging trees to prevent branch damage and reduce organic buildup.
- After storms, perform a quick visual check for debris, punctures, or dislodged components.
- Re-apply sealant to flashing and fasteners every few years, as recommended by your roofer.
- Schedule professional inspections every 2-3 years, even if you inspect regularly yourself.
Upgrades for Older Roofs
- Install walk pads in high-traffic areas to prevent membrane wear.
- Consider reflective coatings for older metal or membrane roofs to reduce heat and UV damage.
- Upgrade drainage systems if ponding is a recurring problem.
Frequently Asked Questions About Roof Inspections
How long does a typical inspection take?
A detailed inspection of a medium-sized storage facility roof (20,000–50,000 sq. ft.) takes 2–4 hours, depending on access and complexity.
Can I do it myself or should I hire a pro?
Regular visual checks can be done by facility staff, but annual or biannual inspections by a qualified commercial roofer are strongly recommended, especially for warranty compliance and complex issues.
What’s the cost of ignoring minor roof issues?
Even small, ignored leaks can escalate to structural repairs costing tens of thousands of dollars, not to mention damaged tenant property and lost reputation.
Conclusion: Protecting Your Investment with Diligent Roof Inspections
Storage facility roofs are the silent guardians of your business. Their condition directly impacts customer satisfaction, liability exposure, and long-term profitability. While roof issues are inevitable over time, most costly disasters can be prevented with a disciplined inspection routine and prompt repairs. By following the steps in this guide, you’ll know exactly where to look, what to watch for, and how to take action before a minor drip turns into a disaster.
Remember, the true value of roof inspections isn’t just in spotting problems—it’s in building a culture of proactive maintenance and risk management. Document your findings, schedule regular inspections, and partner with reputable commercial roofing professionals to handle repairs beyond your expertise. Even if your roof seems trouble-free today, diligence now will save you time, money, and headaches in the future.
Don’t wait for the next big storm to reveal your roof’s weaknesses. Make roof inspections a cornerstone of your storage facility maintenance plan and rest easy knowing you’ve protected your property, your tenants, and your reputation from above.